As part of the overall theme of my car build I have wanted to set my car apart from other less modified or standard E46 M3s whilst staying true to a BMW styling. I wanted the car to look like it could have come off the factory floor as a BMW option package and drive well on the street, whilst also tearing up on the track. This is part of why for most of my build I have referred to it as a Clubsport build and this gave me the idea to try capture that naming and apply it to the theme of the car. There was never officially a BMW E46 M3 Clubsport as the BMW E46 M3 CS that Europe got was actually a Coupe Sport and obviously the CSL was the pinnacle model which as discussed previously I cannot really replicate from.


So I started thinking about badging and labeling and was reminded of some of the M3Forum guys with Supercharged M3s who use a CSL badge but switch it around to give themselves a ///M3 sc which I always thought was kind of cool and set them apart without being too tacky. The use of an original BMW badge instead of some aftermarket fake makes it seem like its something BMW may have actually rolled off the factory floor. So I decided to steal that idea and utilise the CS from a CSL badge to give me a ///M3 cs badge to denote the Clubsport intention of my build and set the car apart without having to rely on CSL styling which I cannot use.
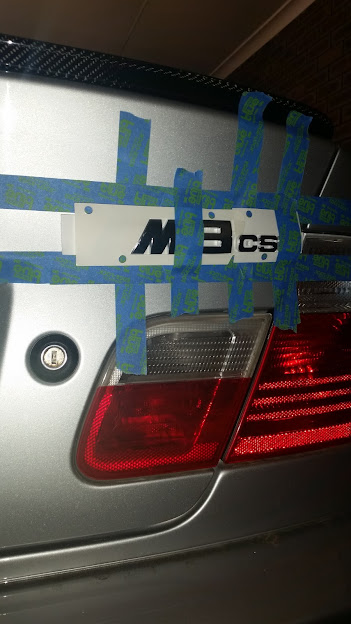
I started by measuring how far off the right edge the standard ///M3 badge sat in and marked that with painters tape. I then marked up a few other features and spacing and taped the new badging over the top to see if i liked the spacing and placement as shown below:

From there I removed the mock up and committed to the masking tape spacing.


I then started by installing the ///M3 badge first, unfortunately I installed the ///M a bit crooked and I am meaning to go back and remedy that when i can be bothered peeling it off again.

Then I added the CS from the CSL badging I ordered from Schmeidmann

Then finally ended up with the completed badging. Aside from the crooked ///M I need to go back and re-align I am pretty happy with the final setup and the overall look that it gives the car.

When looked at next to the Carbon Fibre lip spoiler and against the Titanium Silver paint i think it looks awesome and unique and helps set this build apart whilst still staying true to a traditional BMW style by using parts and styling cues BMW themselves have used on this or other cars.

Comments
Post a Comment